I have become more than slightly obsessed with the American style party food tables. I love the symmetry, the precise placement of treats and the use of props to make your buffet more enticing.
It makes very ordinary food look extraordinary.
Top Tips for the Perfect Party Table:
Sketch your vision beforehand!
That way you know what you need to source and how much of everything to buy.
The danger with assembling your table on the day is that you overbuy on food and can't fit everything on the table! Unless you are a creative genius and can do it from scratch there and then!
Have a central feature.
Start with a central focus point and work outwards. I used his initial wall letter from above his bed propped up on a toy wagon! The more personal you can make the props the better, so root through their toy boxes!
I found this ferris wheel cupcake stand and just used the wheel as a prop!
The birthday cake would make a great focus point too. I always think it's such a shame to keep the cake hidden until it's time to sing, so show it off for the whole party!
Create height and interest.
If you have made beautiful cake and lollies you want to show them off! But on a flat table they can get lost. I used crepe paper to wrap up blocks of polystyrene I bought in the local DIY centre, so that I could simply poke the lolly sticks into them. Minimal effort, maximum impact!
Use cake stands and upturned baskets, I even raided the children's miniature chairs. I found one gum ball machine in a charity shop and one in the local £1 store, which were great for the grown up nuts!
Think about symmetry.
It makes it easier to work outwards, displaying in opposite pairs. Or go completely and purposely mismatched, creating depth with taller storage jars at the back of the table and bowls at the front.
Think mini!
Use cake cases as mini containers instead of one big bowl. Children love having individual portions and it just looks sweeter! Rigid cup cake cases work well turned upside down too as mini stands!
Create a backdrop.
You could use garden canes to make a frame and old duvet covers are fab as a backdrop sheet. The tent canopy is actually for above Sammy's bed, but teamed with the striped fabric, made a perfect mini big top. For a cheap version use twisted crepe paper streamers. You could easily create a 5ft wide backdrop for only a few pounds. Just tie at the top and pin at the bottom.
Cover any odd edges for a clean, professional look. I used an old piece of hessian material for the tablecloth (I would always go for a paper or fabric cloth over shiny plastic - it instantly looks more expensive, when really paper is cheaper!)
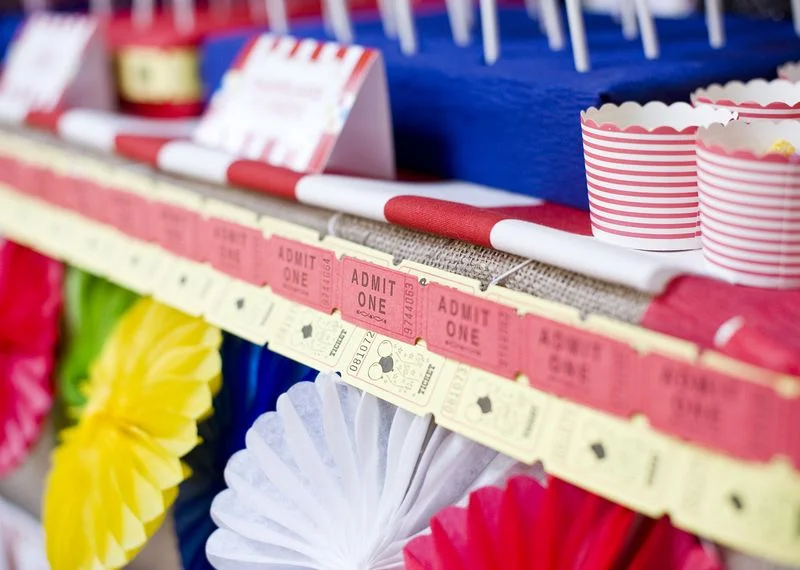
I covered the edge where the two fabrics met with a roll of paper tickets and some brilliantly effective paper fans. I stapled gunned them in place and teamed with the personalised bunting, thought it really had the wow factor. (Photo below by Emily Beale Photography.)
Less is not more!
Think colour, think props, think labels and tags! Tie a ribbon around the jar, print some little labels. It instantly creates a impression. It took seconds to add the ticket ribbons around the lolly stands and the cuddly Circus toys were perfect partners for the food itself. Have a theme in mind and then just go for it!
And if anyone thinks it is over the top take it as a compliment! I bet they wished their party buffet looked as fab as yours!
I got such pleasure from preparing all the details and everyone noticed the finishing touches on the day.
Get snapping.
And finally - leave enough time to photograph it! I would have been so disappointed not to have got some lovely photos of all our hard work! And make sure you 'pin' your photos to Pinterest so others can be inspired.
This post was kindly sponsored by delights - the online party supplies store


